

How to Fix Seams in AI Generated Patterns for Free (Photopea and GIMP Guide)
Learning how to fix seams in AI generated patterns is essential when you want to convert a standalone image into a perfectly repeating tile. You can fix seams in AI generated patterns by shifting the image by half its width and half its height, painting out the cross-shaped seam that appears in the middle, and shifting it back to its original position.
That is the whole method in one sentence. The rest of this guide shows you how to do it step by step in two free editors, Photopea (runs in your browser) and GIMP (a free desktop app), plus a few backup methods for tiles that refuse to cooperate.
If you have ever generated a pattern that looked perfect as a single image and then showed a hard line when repeated on a mockup, you have met this problem. Most AI image generators create one picture at a time. They have no built-in sense that the right edge must continue into the left edge, so the edges rarely match. The fix does not need paid software, and it takes about ten minutes once you know the routine.
Why AI Patterns Show Seams
A seamless tile is an image whose left edge continues into its right edge, and whose top edge continues into its bottom edge. When you place copies side by side, the joins should disappear.
AI generators usually miss this for a few reasons:
- They draw a composition, not a tile. The model makes a balanced picture with a beginning and an end, so shapes are often cut at the borders.
- Lighting and shading drift toward the edges. Many outputs have slightly darker corners or a soft vignette, which shows up as a grid of dark squares when repeated.
- Edge details do not match. A flower may leave the right edge at one height and the left edge shows a different shape at another height.
Some tools offer a tiling option that reduces the problem, but even then the result can be only close. That is why a repair step is a normal part of the workflow, not a sign that you did something wrong.
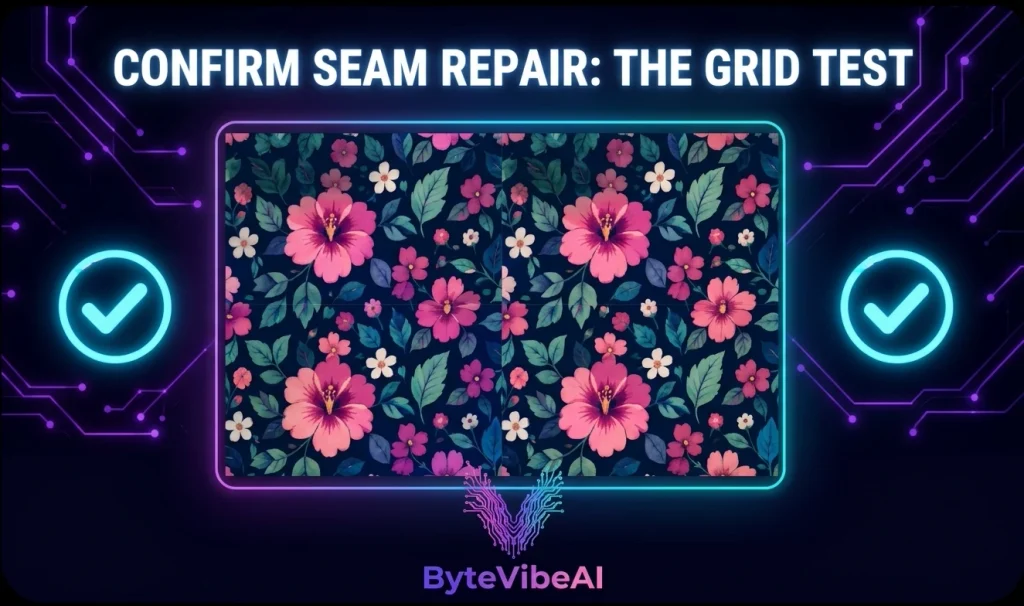
Why You Need to Fix Seams in AI Generated Patterns Before Selling or Printing
A seam that looks small on your screen becomes obvious on a product. On a 24-inch fabric repeat, the same tile edge appears every few inches, so the eye picks it up quickly. Buyers of digital paper packs also test tiles by repeating them in their own software. A visible line is one of the most common reasons for complaints and refunds.
Fixing the seam before you upscale, mockup, or upload saves time later. It is much easier to repair a 1024-pixel tile than a 7200-pixel one.
Quick Overview of the 4 Fix Methods
Instead of a wide table, here is a mobile-friendly summary.
📐 Offset and Clone (Photopea or GIMP)
Best For: Most tiles. This is the main method in this guide.
Difficulty: ✅ Easy
🎭 Layer Mask Method
Best For: Detailed or painterly tiles where you want to undo mistakes.
Difficulty: ✅ Easy to Medium
🧩 Tile Seamless Filter (GIMP)
Best For: Textures and soft backgrounds with no distinct shapes.
Difficulty: ✅ Easy
🔁 Regenerate With Better Prompts
Best For: Tiles with heavy shading, strong focal points, or broken shapes at every edge.
Difficulty: ✅ Easy
What You Need Before You Start
You do not need to buy anything. Pick one free editor:
- Photopea: A free browser-based editor with a Photoshop-like layout. It includes an offset filter, clone stamp, healing brush, and layer masks.
- GIMP: A free, open-source desktop editor for Windows, Mac, and Linux. It features dedicated offset tools, clone/heal tools, and advanced masking.
For a complete breakdown of other creative software options, explore our list of the
Best Free AI Tools for Graphic Design to Create Logos and Social Media Posts.
Image Requirements:
- A square AI-generated tile (e.g., 1024 x 1024 pixels).
- A saved copy of the original file as a backup.
Prepare the Tile First
A few minutes of preparation prevents most trouble later:
- Duplicate your file: Save the original as
pattern-original.pngand work strictly on a copy. - Check canvas symmetry: Ensure the canvas is square and has an even pixel count (e.g., 1024 x 1024 splits cleanly into 512).
- Balance the lighting: If one corner is darker, use a brightness adjustment or a soft brush at low opacity to even out the tone before offsetting.
- Remove borders: Crop out any thin frames or borders added by the AI and resize the image back to a perfect square.
How to Fix Seams in AI Generated Patterns in Photopea
This is the fastest path if you do not want to install software on your computer.
Step 1: Open the Image
Go to Photopea, choose File > Open, and select your square tile.
Step 2: Apply the Offset Filter
Go to Filter > Other > Offset. Enter half of your image size for both values (for a 1024 x 1024 image, set Horizontal to 512 and Vertical to 512). Set the edge behavior to Wrap Around and confirm.
The image now looks cut and rearranged. The old outer edges have moved to the middle and formed a cross. Any visible lines along that cross represent seam errors that need repair.
Step 3: Repair the Cross
Now work on the center. You have three simple tools:
- Clone Stamp. Hold Alt and click a clean area nearby, then paint over the seam. Choose areas with similar color and texture.
- Spot Healing or Healing Brush. Good for small mismatches and soft color differences.
- Copy and paste elements. Select a flower, leaf, or shape from elsewhere in the tile, paste it over the broken area, and blend the edges with a soft eraser.
Work on a new layer when you can, so you can delete mistakes without damaging the original pixels.
Do not touch the outer borders of the canvas during this step. Those are the new edges, and they already match each other because the offset wrapped them around. Changing them will break the tile.
Step 4: Offset Back and Test
Apply the same offset again with the same values (512 and 512) and wrap around. The image returns to its original layout, now with the seam repaired.
Step 5: Run the Check
Apply the offset one more time and look at the center cross. If it is invisible, your tile is seamless. If you still see a line, repeat Step 3 on the remaining spot.
Step 6: Export
Choose File > Export As > PNG for flat designs, or JPG at high quality for painterly styles. Keep the original and the fixed version as separate files.
How to Fix Seams in AI Generated Patterns in GIMP
GIMP offers robust control and handles high-resolution files smoothly.
Step 1: Open and Duplicate Layer
Open your tile with File > Open. Duplicate the layer via Layer > Duplicate Layer to protect your original image.
Step 2: Offset the Layer
Go to Layer > Transform > Offset. GIMP has a button that fills in half the width and height for you. Set the edge behavior to Wrap Around and click Offset.
Step 3: Clone and Heal
Select the Clone tool (shortcut C). Hold Ctrl and click a clean source area, then paint over the cross seam. For soft color transitions, use the Heal tool (shortcut H). Resample your source point often to avoid obvious repeated patterns.
Step 4: Offset Back and Export
Open Layer > Transform > Offset again, apply the same half-size offset values, and return the image to its original layout. Once verified, go to File > Export As to save your final PNG or JPG.
Method 3: The Layer Mask Method
This approach works best for complex, highly detailed tiles:
- Duplicate your tile layer so you have a top layer and a bottom layer.
- Offset only the top layer by half its width and height using Wrap Around.
- Add a Layer Mask to the top layer.
- Using a soft black brush, paint over the broken seams on the layer mask to reveal the clean, unedited bottom layer underneath.
- Merge the layers, offset back, and test.
Method 4: The Tile Seamless Filter in GIMP
GIMP has a filter that blends the edges automatically. You usually find it under Filters > Map > Tile Seamless, though the name and location can differ by version.
It works well on soft textures, paper looks, clouds, and backgrounds without distinct shapes. It works poorly on patterns with clear motifs, because blending the edges creates ghosted, half-transparent copies of flowers or shapes. If you see that effect, undo the filter and use the offset and clone method instead.
Method 5: Regenerate Instead of Repairing
Sometimes starting fresh is faster than repairing a heavily distorted tile. Consider generating a new image if:
- Large focal shapes are cut off at every border.
- The tile has severe dark vignette shadows in all four corners.
- The central cross covers more than 50% of the graphic details.
How to Confirm That the Fix Worked
Always perform these two checks before publishing:
- The Offset Check: Apply the offset filter one final time. If the center cross is completely invisible, your edges match.
- The 3 x 3 Grid Check: Create a new canvas that is three times the size of your tile (e.g., 3072 x 3072 for a 1024 tile). Fill the canvas with a 3×3 repetition of your tile to inspect for visible grid lines or harsh diagonal patterns.
Prompt Tips That Reduce Seams Before You Start
Optimizing your AI prompt minimizes seam artifacts during generation:
- Include technical terms:
"seamless repeating pattern, evenly distributed, tileable, no central focal point". - Specify lighting and background:
"solid cream background, flat lighting, no shadows, no vignette, no border". - Use negative prompts:
"border, frame, vignette, shadow, text, watermark, central object".
Expert Tips for Cleaner Results
- Fix first, upscale later: Always repair seams at the original generation size before running resolution upscalers.
- Organize your workflow: If you manage high-volume creative projects, check out our guide on How to Build a Weekly Work Plan From Your Emails, Tasks and Calendar Using AI.
- Zoom in during repairs: Inspect seams at 200% magnification to fix tiny pixel gaps.
- Vary clone sources: Frequently re-sample clean areas to prevent repeating texture blobs.
Common Mistakes to Avoid
- Editing Outer Edges After Offsetting Back: Never paint on the canvas borders after reversing the offset; doing so ruins edge continuity.
- Ignoring Vignette Lighting: Unbalanced corner lighting creates grid boxes even if structural seams are hidden.
- Using Automatic Filters on Clear Motifs: Rely on manual clone and mask tools for detailed illustrations rather than automatic blend filters.
Frequently Asked Questions
Can I fix seams in AI generated patterns without Photoshop?
Yes. Photopea and GIMP are free tools that include offset filters, clone stamps, healing brushes, and layer masks necessary to fix pattern seams.
What offset values should I use?
Always use exact half-values of your image dimensions. For a 1024 x 1024 image, use 512 horizontal and 512 vertical.
Why does my tile still look like a grid after fixing seams?
Uneven lighting or dark vignette corners cause visible grid lines. Balance image exposure before running the offset filter.
Final Thoughts
Learning how to fix seams in AI generated patterns allows you to turn raw AI outputs into commercial-grade seamless tiles. Following the core workflow—duplicate, offset, clone/repair, offset back, and grid test—ensures clean results across any pattern style.
Call to Action
Ready to design smarter? Explore more AI Design guides on ByteVibeAI for beginner-friendly tutorials, prompt templates, and free AI tools.